Once upon a time, the requirements of a job dictated the
sort of tool needed to do that job. Now, tools are being invented for which there
are no jobs. This is still a money-making situation because with proper marketing
everyone can be infected with the desire to own one of these new jobless tools. (The
tool's real job is to make the buyer feel good about herself.)
This is a story about a
job that needed a better tool; just like in the old days.
Digital cameras, even cheap ones,
produce amazingly good video and audio. Many quality YouTube videos are produced
with these simple cameras.
I wanted to do some video
recording of a model airplane while it was flying. I could not; the model was too
small and dim in the sun-lit camera display. I needed an eye-level viewfinder.
I got a camera that had such a
view finder, only to learn that it was not an optical view finder but rather a little lens
in the back of the camera and a very small digital display. Variations in people's
vision made it difficult to use, and if the user was wearing glasses, there was
insufficient eye-relief to view the whole tiny display.
I could get a much more expensive
camera with a true optical view finder but why should I be paying more and more to get
older and older technology?
Consequently, I reconsidered what the job was
that I wanted done. It was simple. I needed to block the sun from the camera's
large display and at the same time make it easier to track a fast-moving object in the
camera's field-of-view. I needed a magnifying lens for an eye-level view finder.
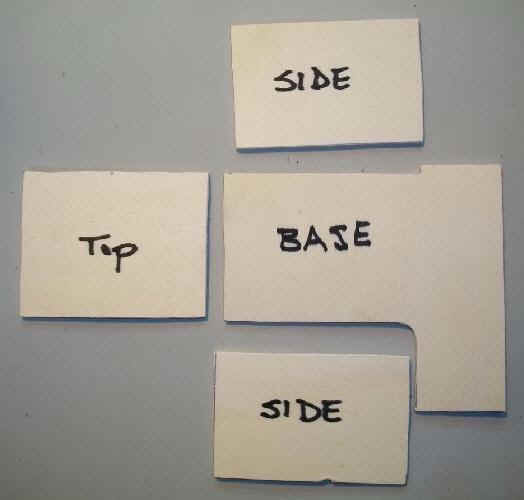 I
drew my patterns directly on a small sheet of light, 1/8" poplar ply like can be had
at most hobby shops and cut out the pieces. I
drew my patterns directly on a small sheet of light, 1/8" poplar ply like can be had
at most hobby shops and cut out the pieces.
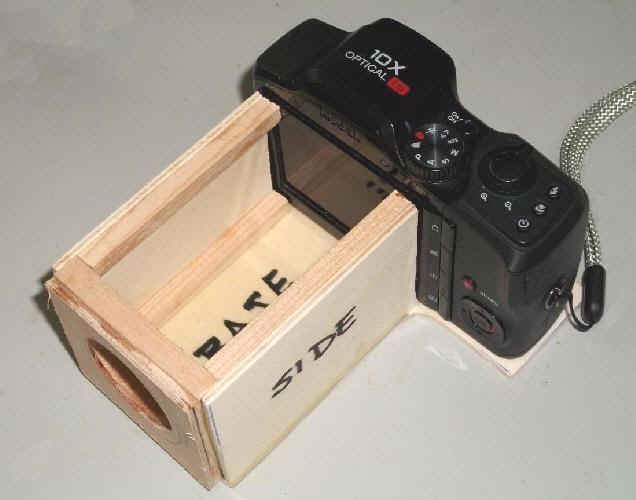
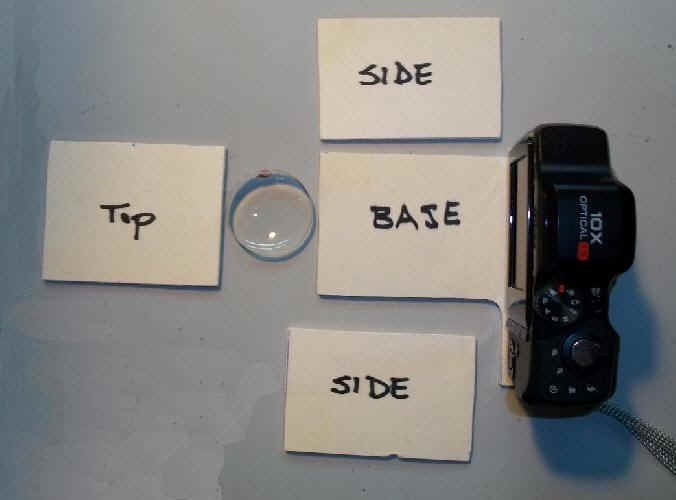 After a little jury-rigging and going through my stock
of surplus (chipped) lenses, I found the one I wanted. This Kodak digital camera
would do fine, but most any digital camera of this sort would. After a little jury-rigging and going through my stock
of surplus (chipped) lenses, I found the one I wanted. This Kodak digital camera
would do fine, but most any digital camera of this sort would.
 I used CyA glue for rapid building and I reinforced the
joints with 1/4" square spruce sticks, also from a hobby shop. I used CyA glue for rapid building and I reinforced the
joints with 1/4" square spruce sticks, also from a hobby shop.
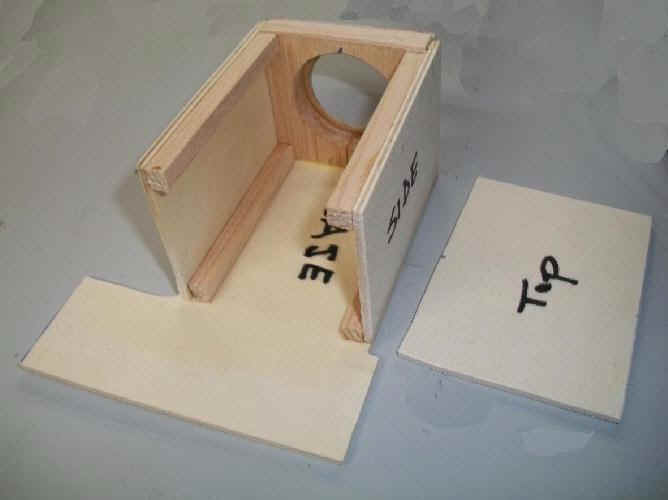
 The lens holder was fabricated from balsa and light ply
and its position was determined by focusing on the display screen. The lens would be
pushed in the hole and held in place with black silicone sealant. The lens holder was fabricated from balsa and light ply
and its position was determined by focusing on the display screen. The lens would be
pushed in the hole and held in place with black silicone sealant.
 Using CyA makes this cut-and-fit go fast. No
gasket material is needed to keep the light off the display if there is a snug fit of wood
to camera. Using CyA makes this cut-and-fit go fast. No
gasket material is needed to keep the light off the display if there is a snug fit of wood
to camera.
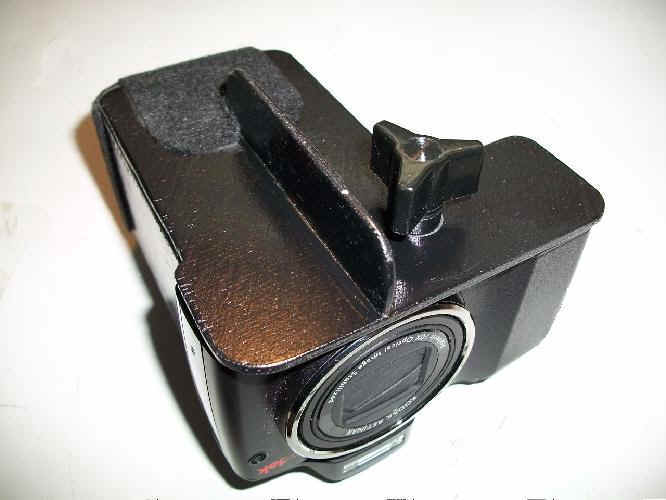
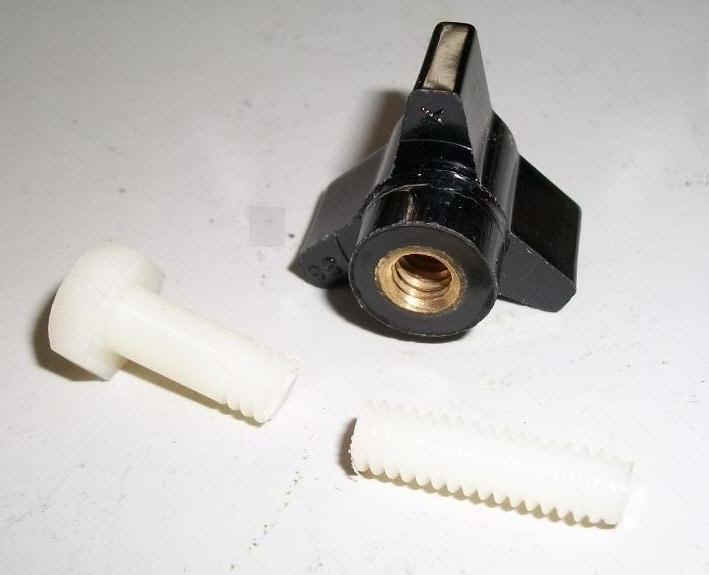 Ace Hardware had the 1/4"-20
plastic knob and a 1/4"-20 nylon bolt. The depth of the hole in the knob was
determined, as well as the thickness of the ply base for the camera, and the depth into
the camera I wanted the bolt to go. I cut the threaded section of the bolt to that
length to have the threaded rod on the right. Ace Hardware had the 1/4"-20
plastic knob and a 1/4"-20 nylon bolt. The depth of the hole in the knob was
determined, as well as the thickness of the ply base for the camera, and the depth into
the camera I wanted the bolt to go. I cut the threaded section of the bolt to that
length to have the threaded rod on the right.
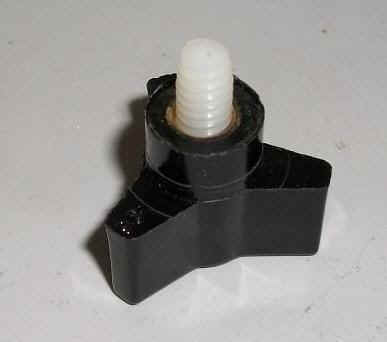 Once I knew I had the proper
length of threaded rod, I put a drop of CyA in the bottom of the knob hole and screwed in
the threaded rod. Once I knew I had the proper
length of threaded rod, I put a drop of CyA in the bottom of the knob hole and screwed in
the threaded rod.
 The top cover was glued on once I knew exactly where the
camera would be mounted. The top cover was glued on once I knew exactly where the
camera would be mounted.
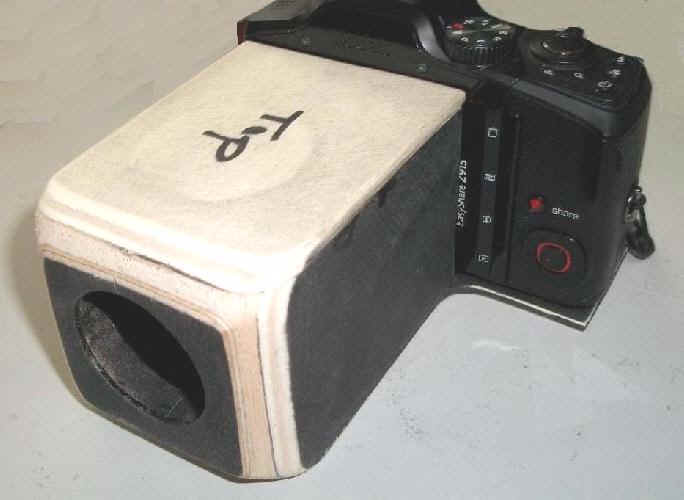 The rear edges of the case were rounded just because I
could do it easily. The rear edges of the case were rounded just because I
could do it easily.
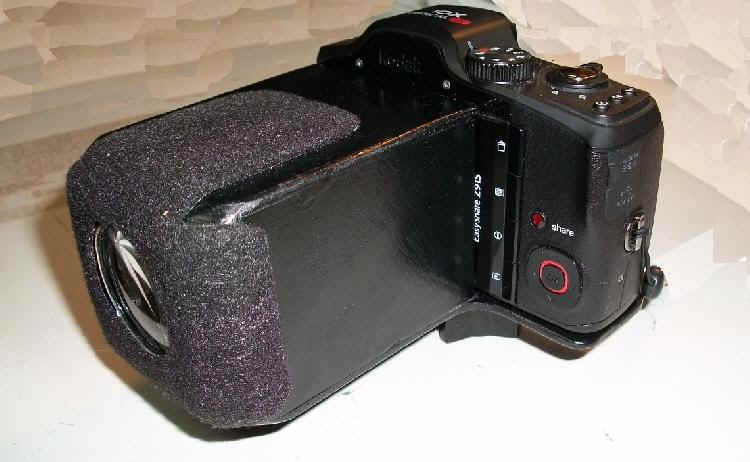 The light shield was painted flat black inside and gloss
black outside. Then the lens was installed. Adhesive-backed black felt (from
same hobby shop) was put around the lens area to protect eye glasses from being scratched
or smudged. The light shield was painted flat black inside and gloss
black outside. Then the lens was installed. Adhesive-backed black felt (from
same hobby shop) was put around the lens area to protect eye glasses from being scratched
or smudged.
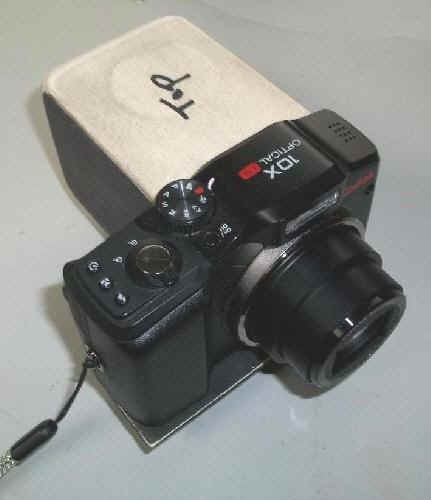
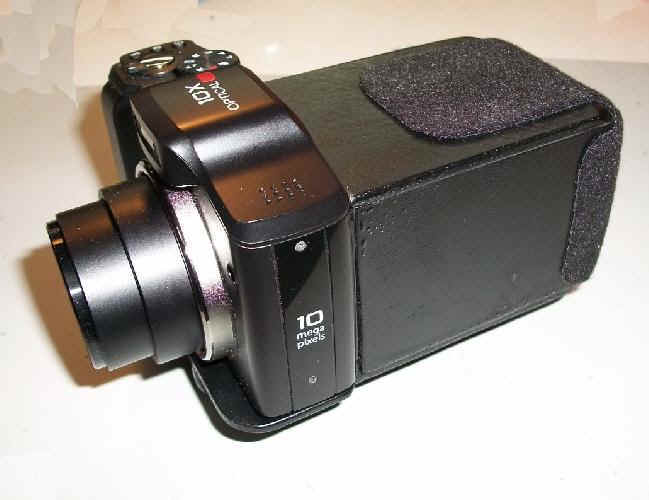
 This little fin was added to the bottom so the camera
could sit in a horizontal position on a table. Besides which, it stiffens the whole
light shield. If the fin was going to be left off, the bottom of the case should be
from 1/8" birch ply for rigidity. When the light shield is mounted to the
camera, they will feel like a single unit. This little fin was added to the bottom so the camera
could sit in a horizontal position on a table. Besides which, it stiffens the whole
light shield. If the fin was going to be left off, the bottom of the case should be
from 1/8" birch ply for rigidity. When the light shield is mounted to the
camera, they will feel like a single unit.
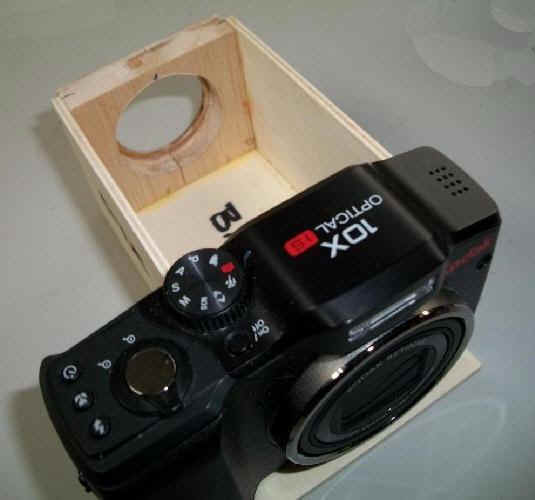
 This light shield and magnifier works quite well for video
recording and even for stills when making them outside in bright light. All the
features of the camera can still be accessed. When viewing through the back lens,
each diode of the display screen can be seen. This is optimal focusing of the
viewing lens. Using this outside can become a habit though the shield is easily
removed. In either case, if used all the time, the brilliance of the display screen
should be turned down for indoors. This light shield and magnifier works quite well for video
recording and even for stills when making them outside in bright light. All the
features of the camera can still be accessed. When viewing through the back lens,
each diode of the display screen can be seen. This is optimal focusing of the
viewing lens. Using this outside can become a habit though the shield is easily
removed. In either case, if used all the time, the brilliance of the display screen
should be turned down for indoors.
It would be easy to manufacture a
single-sized unit like this to fit any digital camera with a tripod mounting recess.
Most digital cameras are
"view cameras" as were the first cameras. The projected image was seen on
ground glass at the back of the camera. Actually, the first cameras had them and all
of Mathew Brady's American Civil War photos were made with such a view camera. He
had a large black cloth draped over the back of the camera to shield the viewing screen
from light. He would put his head under the black cloth to frame and focus the
image.
The only differences here is that
our images are right side up and not upside down as were his; and we have a magnifier
built in. So, again we race to the future to discover the past. |